3. My Account
4. Creating and activating tracker (manually)
4.1. Creating and activating tracker (automatically)
5. Setup
8.1. Tools:Overview
8.2. Tools:Alerts
8.3. Tools:Geofencing
8.4. Tools: Reports
8.5. Tools: Send command
8.6. Tools: Other
8.7. Tools: Camera/Media
8.8. Tools: Tasks
8.9. Tools:Maintenance
8.10.Tools: Dashboard
8.11. Tools: Sharing
9. Widgets
11.Plugins
In setup window you can setup multiple settings for all your gps trackers, create groups, drivers, custom events.
Main

In the main tab you can define speed, capacity, altitude measurements and also select timezone for all your gps trackers. At the bottom there is server region and IP address you are logged in to. For daylight saving time (DST) it is always recommended to use Automatic option and select your own country.
Object groups
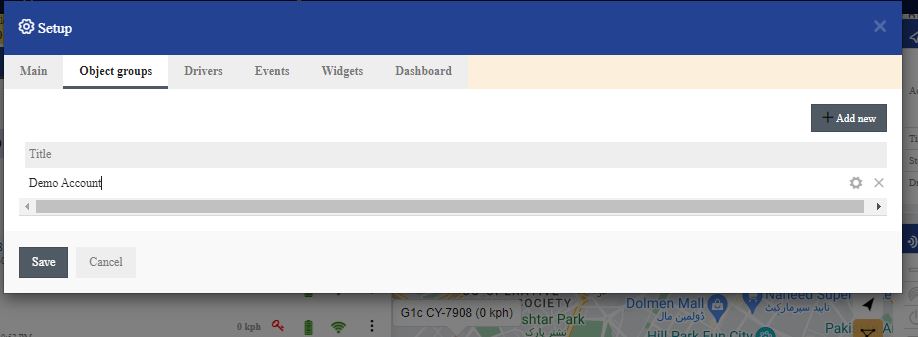
In “Object groups” tab you can create groups for your gps devices. To assign a device of your created group, go to Object->Edit->Vehicles Information>Group, select your created group and click Save.
Drivers
Here you can create drivers, click “Add driver” to create one. Type in any name and select your gps device. If your device has iButton or RFID, type in rfid/ibutton number in RFID field. GPS server automatically identifies gps device protocol and decodes rfid message. After creating new driver, swipe the card/item over your rfid device and you should see driver name in the left bottom panel or by clicking on the object.

Event
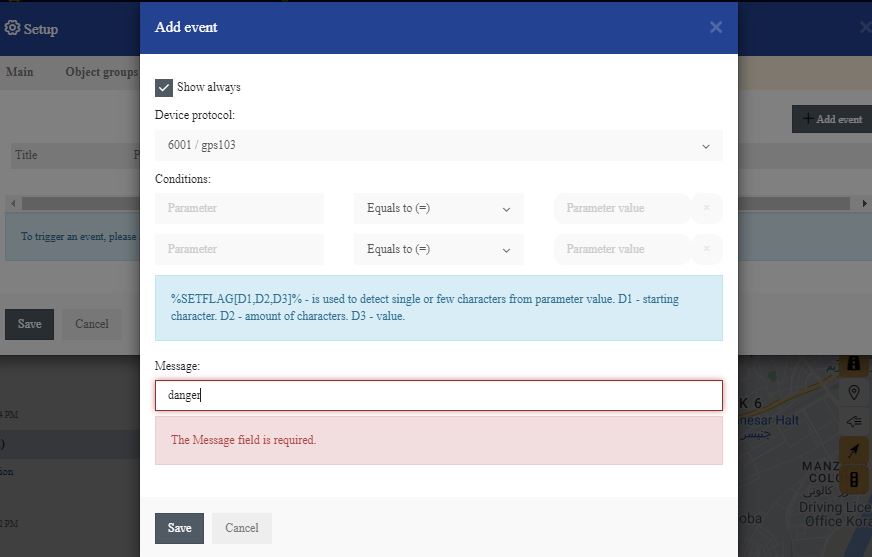
Here you can define your custom events. For example you can define that if SOS button is pressed, device battery ran low, etc. event will be triggered.
To know which protocol to select, please connect your gps device to the platform and check object details:
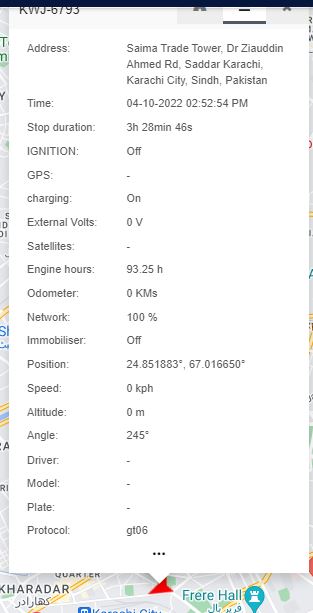
In the picture above and in the example below there is a protocol – “gt06”.
Before digging deeper creating an event, please take a look at the schema below for better understanding how data travels from gps tracker to gps server and how it is proccessed:
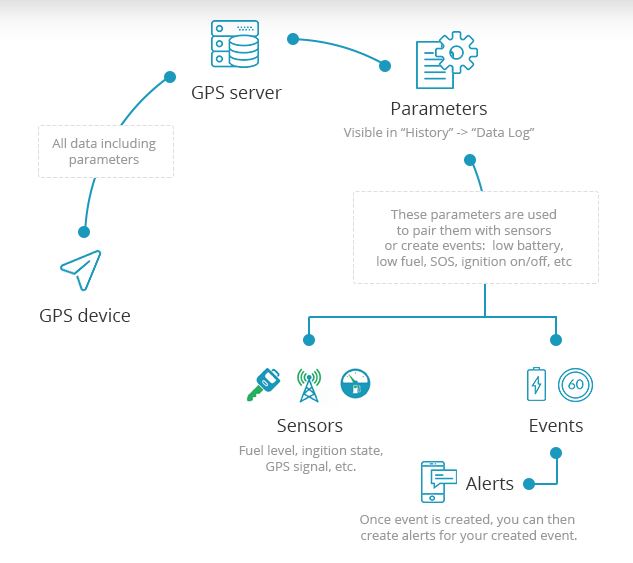
To check what parameters your gps tracker is sending, please go to History->Select object->Show history->Data log.
(At the top there are parameter names and below – parameter values)
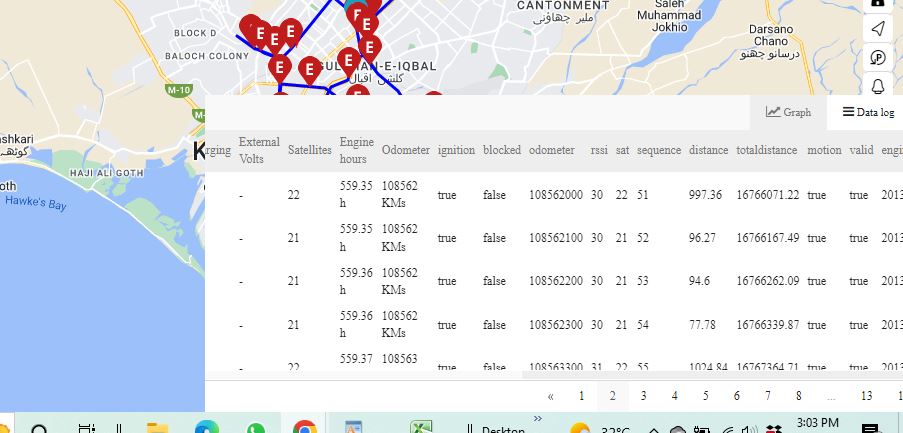
There are many parameter names like “sat, adc1, io21…” etc. So if you want to create an event for parameter “sat”, then you have to input sat in the parameter name field. This will pair event with parameter.
Note: some gps tracker’s, like Coban GPS306 OBD, are sending parameter names that are easily recognisable(odometer, fuel, rpm, etc.), but others, like Teltonika are sending them like ioXXX. To know the meaning of parameter names like ioXXX, you need to check manufacturer’s user manual/documentation or identify them manualy, for example, trigger some sensors and monitor parameters at the same time like doors open, fuel level, etc…
Example 1
In the picture above we showed event for teltonika gps device FM1010. We know that io66 parameter stands for “external power” and we also know that if parameter’s value drops below 1000 it means that engine was turned off. We can check later messages and we will see that in the data log, this parameter value will go lower after the engine is turned off. So in the event tab we need to select protocol teltonika, input io66 in the parameter name field, select less than in the next select box and input 1000 in the last field. In the message field write in what text you want to see when event is triggered.
Example 2
Let’s say your parameter name is battery and you want to create “Low battery” event. In the Add event window, select device protocol, input parameter name battery, select less than and input any value you want, for exampe 10 or 15. In the message field write in any text you want. Now when device battery goes down to 10 or 15, event will be triggered.
Example 3
Now let’s create SOS event. For example, coban gps tracker, when sos button is pressed, sends parameter alarm: help me, then all we have to do is just enter alarm in the parameter name field, select equals to and write in help me in the parameter value field.
Note: events will be triggered if alert for it is created: Tools->Alerts->Add new
Setflag exaplanation:
For example, tracker is sending status like this:
00010(moving, sos alarm), 10010(not moving, sos alarm).
4th number means if sos is sent. Other number can mean other statuses, so instead of creating event for each possible status combination, you can just use setflag, to detect only 4th number from the string.


